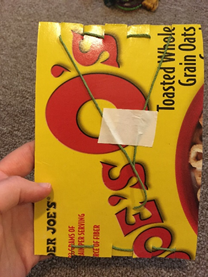
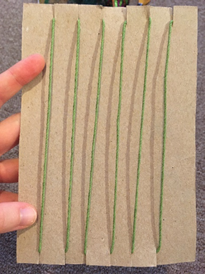
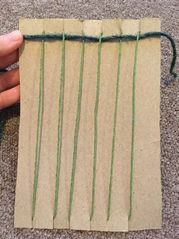
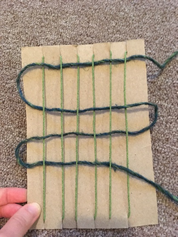
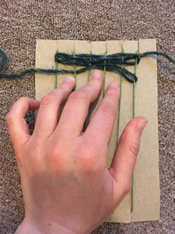
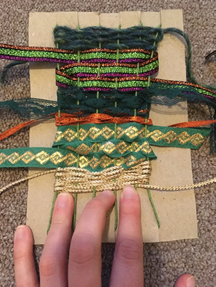
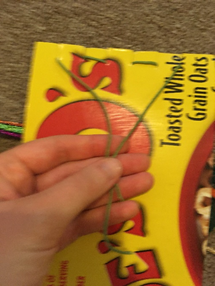
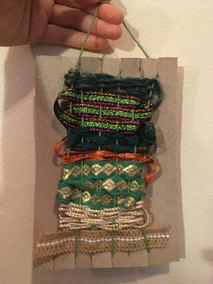
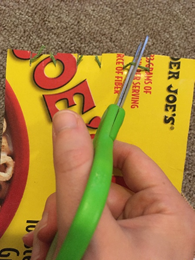
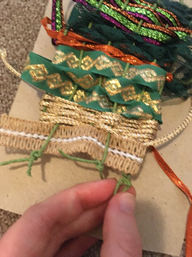
Make It With Miss Rachel: Cardboard Loom | | 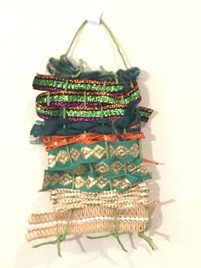 | This week’s Make It craft can be a complicated project for more experienced artists or a fun fine motor activity for little makers—the only difference is in how tight you weave the strands, and how you choose to finish the project! | | 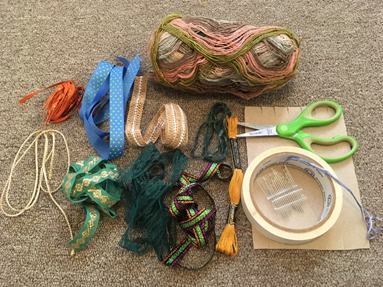 | First, gather your materials. You’ll need some cardboard—recycled cereal boxes work well since they are easy to cut—scissors, tape, and materials to weave with such as yarn, twine, and ribbon. You can even get experimental with materials like strips of tinfoil, cloth, bark, feathers, and leaves if you wish! Older or more experienced crafters who used very fine threads may want a needle to help finish their project or to use as a shuttle, but I did not use one, and do not recommend it for first time weavers. | | 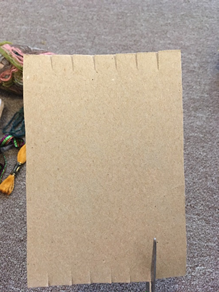 | Next, make your loom! Cut a rectangle of cardboard that is roughly the size and shape you would like your tapestry to be, then cut an even number of notches across the top and bottom, about the same distance apart. (I made 6, about half an inch apart.) | | | | Cut a long piece of twine or yarn and string your loom. Start at the back and tape the loose end in place. (Leave yourself a few inches of tail—you’ll use this to hang your project later!) Wrap the long end of the yarn around the front, top to bottom, then across the back in between the “teeth” of the notches, then around the front again, bottom to top, until you reach the end of the loom. Leave another loose tail and tape it in place at the back. | | | | | | Now the fun part! (If this is a fine motor exercise for a very young child, now is the time to call them over.) Choose a different colored strand of ribbon or yarn and begin weaving it horizontally through your strands. Leave yourself a few inches of tail at the beginning, and follow an over-under-over pattern until you reach the end of a row. When you turn on the loom to go in the opposite direction, think about what you just did last—if you went over, go under when you turn. If you went under, go over next. Turning might be complicated for the youngest makers. It is okay to just offer them lots of different pre-cut colors and textures of ribbon to weave, push, and pull through the warp of the loom! Weaving loosely can help you see what you are doing. Push your work up to the top of the loom with your fingers from time to time to tighten your work and give yourself more space. | | | | Continue until you run out of yarn or get bored with that color/texture. Leave an inch or two of tail, then start on the same side of the loom with a new piece of material. The same rule for turning applies, even if you are starting new material. Remember to gently push your weaving to the top of your loom to tighten your work, and always leave tails at the beginning and end of whatever new material you choose to add. Continue weaving until you reach the bottom of the loom. | | | | For a simple finish, just tuck the loose tails into the back of your work (or weave it through vertically, if you’re feeling dexterous) and trim off the extra. If the material is too thick to weave in, it is okay to simply cut off the tails. Then flip the loom over, remove the tape from the two long ends of the warp, and tie them together to create a hanger. You can hang the entire piece up still on the loom! This works especially well for a little weaver’s fine motor project, which might be too loose to hold up to a more complicated tying-off. | | | | For a free-hanging tapestry, flip the loom to the back and cut the loops between the notched teeth of the loom, bottom and top. Carefully double-knot the cut ends together—be careful not to pull the strings tighter than they would have been on the loom. For added durability and weight, you can knot the ends around a dowel rod, twig, or pencil. | | 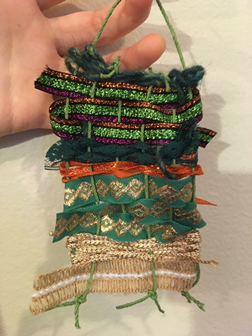 | And voila! Hang your art somewhere safe and enjoy the varied colors and textures! Looking for more fun art projects? Try out Creativebug, our new database of online art and craft instruction videos, accessible with your library card here! Have any questions about this project? Want to show us what you made? Email us at childrenslibrary@einetwork.net, or tag us on Instagram (@mtlebanonlibrary) or Twitter (@mlplkids) with the hashtag #mlplmake. | | | |  | | | www.mtlebanonlibrary.org Twitter: @mlplkids
Insta: @mtlebanonlibrary
Friend us on Facebook | | | Contact Us Mt. Lebanon Public Library
16 Castle Shannon Blvd
Pittsburgh, PA 15228
412-531-1912x4
Childrenslibrary@einetwork.net
, | | | | | | | |