Make It with Miss Rachel: Mix n' Match Flap Books |
|
|
|
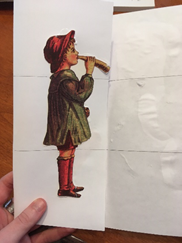
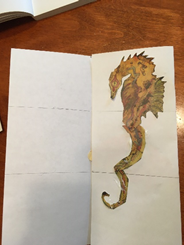
This activity is equal parts art, book, and toy! Flip the flaps around to see what kind of different crazy scene or creature you can create. Talk with your child about what they see—try naming each person, animal, or scene they make. For added fun, have a different member of your family draw or collage onto each part of the book before cutting it up to make a true exquisite corpse!
|
|
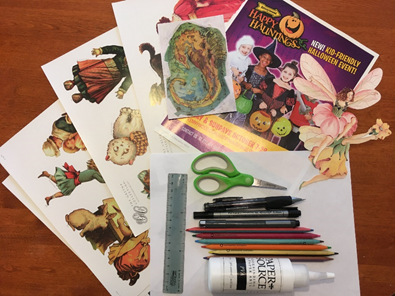 |
To make it, you’ll need, at minimum, something to draw with, something to cut with, and a sheet of paper. I also added some colored pencils, glue, a ruler, and collage materials. (Old newspapers or magazines work great!)
First, divide your paper into three roughly equal sections. A sheet of paper that is 11” across (standard printer size) divides into three sections of just over 3.5”, if you want to measure—but eyeballing is also fine. Fold each of the two side flaps across to touch the opposite edge to make creases. It should look like this when you’re done: |
|
 |
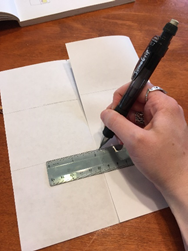
The next step, as close observers of the above image might have guessed, is to divide the two side flaps into three horizontal sections. (8.5” splits into three sections of about 2.8” each—I just went slightly under 3 inches for each and called it good.) They don’t have to be even, exactly, but it is helpful if the bottom flap on the right is the same size as the bottom flap on the left, and so on. An easy way to make sure of this is to either take a long ruler and draw a line across the entire page, or to fold one flap in like so before ruling a line across both flaps at once, leaving the middle blank: |
|
 |
Now comes the fun part!
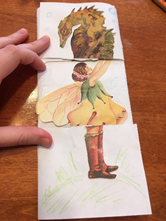
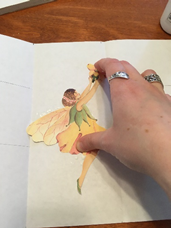
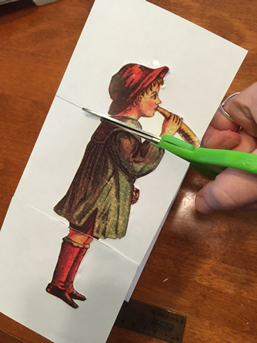
If you would like to go with the collage method and have old magazines or newspapers handy, go hunting for images and cut out some promising figures! It helps if they have the same relative proportions and fit within the 3.5 inch margins of each flap, but it isn’t strictly necessary. Art is allowed to be messy, especially a project like this, where silliness is the point!
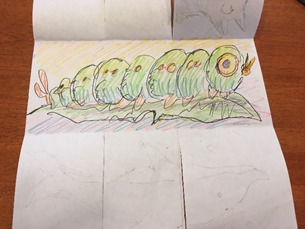
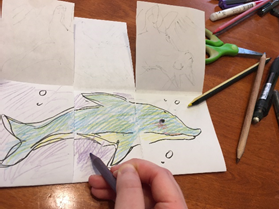
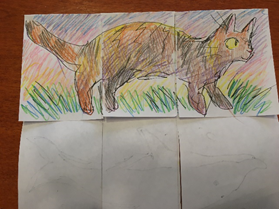
If you are drawing, go ahead and get out your markers, pencils, crayons, etc. Decide whether you would like your book to be horizontal (landscape) or vertical (portrait), and then either draw or glue whatever you would like in the center of your paper, leaving the inner right and left flaps blank. |
|
|
|
Now fold each flap in, one at a time, and either glue or draw a figure on each. (You want the figure to be on the back of the paper—the outside of your book. |
|
|
|
|
|
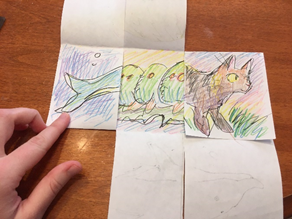
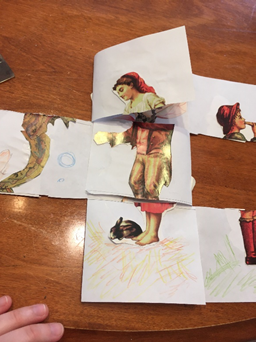
To finish your book, cut the right and left (or, if you made a landscape-style book, the top and bottom) flaps apart on the two lines you made earlier when you divided them into three, leaving the center panel untouched. Flip and fold the divided panels around and enjoy your creations! |
|
|
|
If you’re feeling ambitious or have a young artist in need of a challenge, try adding words to the blank panels to create a second sort of mixed up flip book when you reverse the folds—one half images, one half crazy sentences! If your artist loves to draw or to cut and glue, add extra images to the blank spots—double the book for double the fun! If you have any questions about this project or just want to show off what you made, contact us at childrenslibrary@einetwork.net or by tagging our twitter, @MLPLKids with the hashtag #mlplmake! Love making wacky books? I learned how to make this toy book from Magic Books And Paper Toys by Esther K. Smith, currently only in our library catalog as a print item. While you’re waiting for physical services to resume, Creativebug, our online database of step by step craft tutorials, is still free and available with your library card! Happy crafting! |
|
|
|
|
|
www.mtlebanonlibrary.org Twitter: @mlplkids
Insta: @mtlebanonlibrary
Friend us on Facebook |
|
|
Contact Us Mt. Lebanon Public Library
16 Castle Shannon Blvd
Pittsburgh, PA 15228
412-531-1912x4
Childrenslibrary@einetwork.net
, |
|
|
|
|
|
|
|